Best Practices for Uninterrupted Streaming
When streaming audio, you want to make sure that interruptions such as system sounds and are eliminated. The following is a list of Windows settings that you might want to consider to ensure that your stream is as clean sounding as possible. The screenshots in the following article are from Windows 10.
Disabling System Sounds
Disabling System Sounds in Windows can help to ensure that your stream is not interrupted by unwanted noises. You can disable system sounds in your Windows settings.
Step 1) Right-click on the speaker icon in the bottom right corner of your screen.

Step 2) In the menu that opens when you select the speaker icon, select the Sounds option.
Step 3) In the Sounds window, switch the Sound Scheme drop-down menu to ‘No Sounds’, as shown below:

Also, make sure that the ‘Play Windows Startup sound’ checkbox is also unchecked.
Step 4) Click the OK button at the bottom of the window to save your settings.
Selecting Maximum Performance Settings
When streaming, you want to make sure that your computer is fully dedicated to the task and that your steam will not be interrupted by any power-saving features. The following section describes how to check your Windows settings:
Step 1) Click on the Windows menu in the bottom left corner of your screen.

Step 2) Select the Settings icon in the Windows menu.

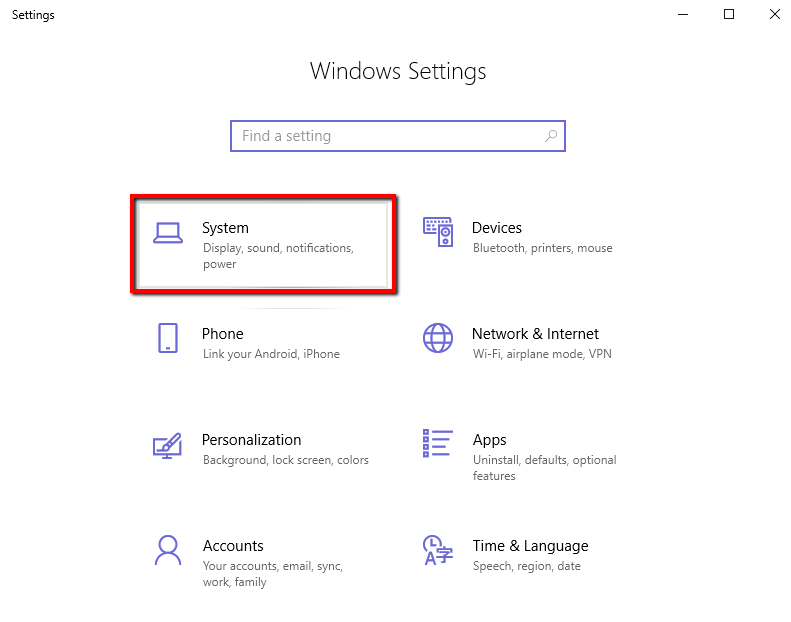
Step 3) In the Settings window, select the System option as shown below:
Step 4) In the following window, select the Power & Sleep menu item on the left.

Step 5) On the right-side of the Settings window, in the Sleep section, select the ‘Never’ option from the drop-down menu.
Windows Update Settings
Windows updates are necessary to keep your PC in good working order, however, it’s possible to select the timing of these updates to minimize the interruptions to your stream, or plan to stream from a different PC while the Windows updates are being installed.
Step 1) Click on the Windows menu in the bottom left corner of your screen.

Step 2) Select the Settings icon in the Windows menu.

Step 3) In the Settings window, scroll down to the bottom and select the Update & Security option.

Step 4) In the following window, select the Windows Update option.
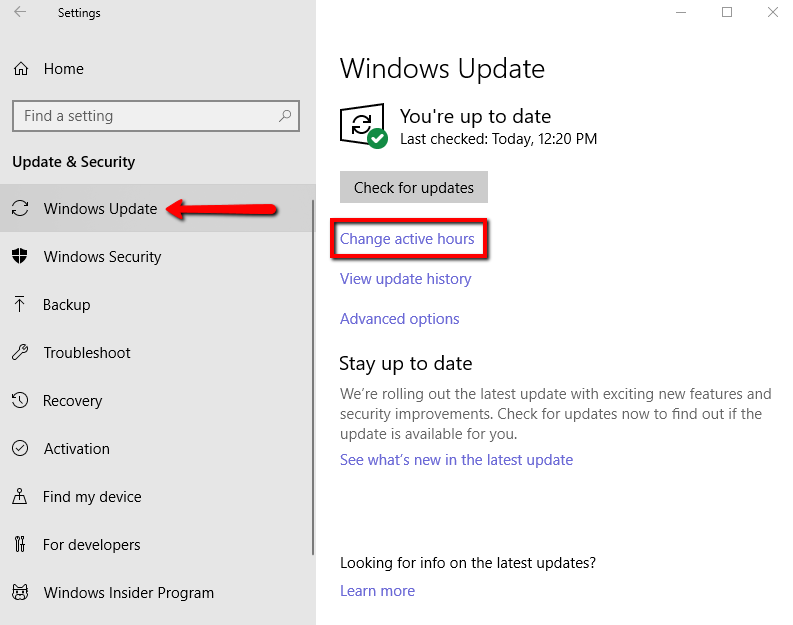
Step 5) On the right side of the Windows Update Settings window, click the Change Active Hours option.
Step 6) In the Active Hours window, you can choose periods of time for your computer’s performance not to be interrupted by Windows Updates.
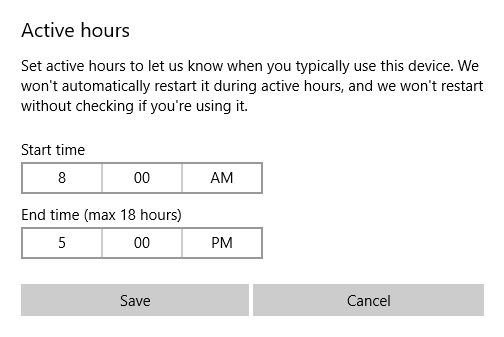
The times that you choose here will depend on your setup, and your broadcasting schedule. If you prefer, you can schedule the updates to occur only at night when fewer listeners might be affected, or only during the day when a user is around to manually ensure that your stream is being temporarily broadcast out on another device while the updates are taking place.
To further minimize downtime after a Windows Update, check out Best Practices for auto-start of Rocket Broadcaster.
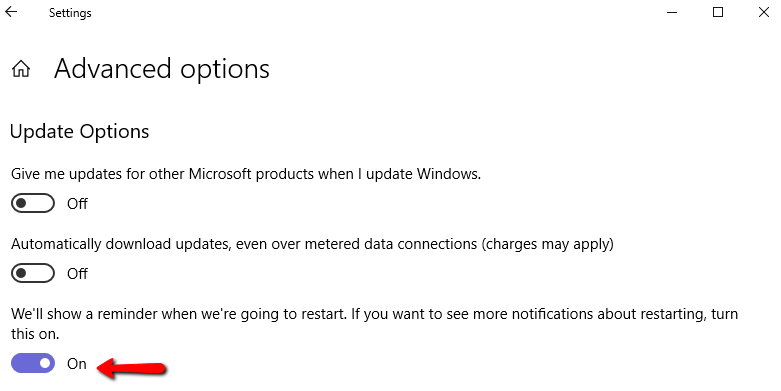
Step 7) Note that if you click the Advanced Options link in the Windows Update Settings window, you can also choose to see notifications from Windows before the computer restarts for an update.
This article is part of a series on best practices for running Rocket Broadcaster. Read more about best practices for running Rocket Broadcaster.